

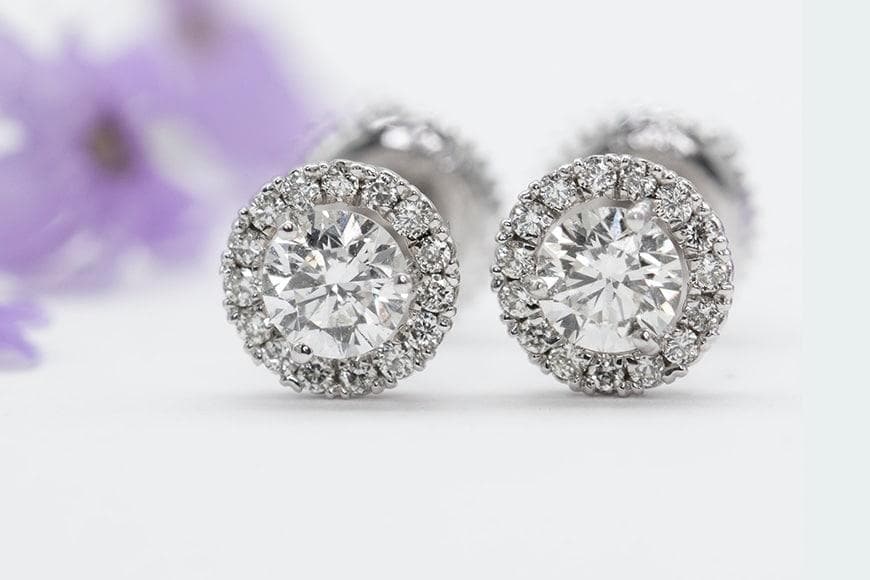
Jewelry photography is probably the most demanding and intricate type of product photography. You have to photograph small and reflective products while trying to showcase their tiniest details without any weird reflections. Taking professional jewelry photos requires the right equipment and the right approaches.
Today we’ll talk about jewelry photography lighting setup and how this aspect of photography affects results. Furthermore, we will give you some useful tips to help you do everything right to ensure a proper setting.
Lighting is a crucial aspect of jewelry photography since it affects your products’ reflections, shadows, and angles. So let’s get started and learn more about jewelry photography lighting.
In this article
Why Is Proper Lighting Setup Essential for Jewelry Photography
Jewelry photography can be divided into two categories:
- Lifestyle or editorial;
- E-commerce or product.
Jewelry product photography is all about taking jewelry photos on solid colored backgrounds, and these photos are used for showcasing products on various online sites and stores. Customers look at these images as they help them determine whether they want to buy or not.
As far as lifestyle jewelry photos are concerned, they are usually images of models with backdrops that create some scenes and give further context about the product. Lighting is one of the most critical factors in jewelry photography because there’s so much room for unwanted reflections and uncontrolled lighting.
Simply put, if you make lighting setup mistakes, it’s easy to get terrible results. Apart from highly reflective products, they are also very small, and you must take close-up shots with your camera.
Light Tips for Jewelry Photography
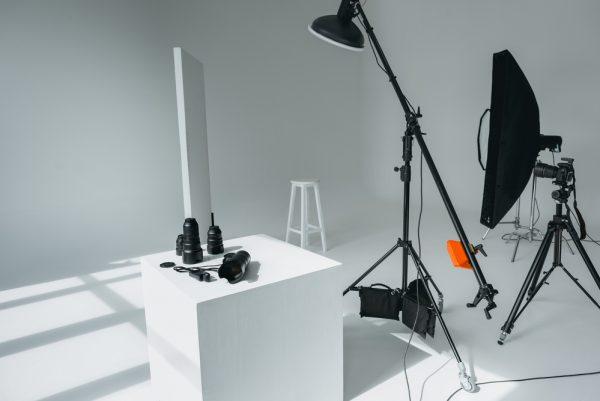
Here are some general lighting tips you can use to your advantage when photographing jewelry. Of course, remember you should get quality jewelry photography equipment if you want professional results.
-
Use Soft Lighting
Natural lighting is the best lighting source for any type of jewelry photography. However, you can always rely on natural lighting to get reliable photos. Depending on your area, you might get rain, snow, or simply cloudy weather. Furthermore, jewelry photography requires soft lighting, and you can’t always get that from the current weather.
Since jewelry is very sensitive to lighting, soft or normally diffused lighting is the best option. One of the best ways to create excellent soft lighting is to close the light source to the product. That makes the lighting source more significant than the product and softens the light.
Use a light tent or a softbox and place them behind the lighting source to create diffused lighting evenly distributed across the whole product and room.
-
Use Light Modifiers
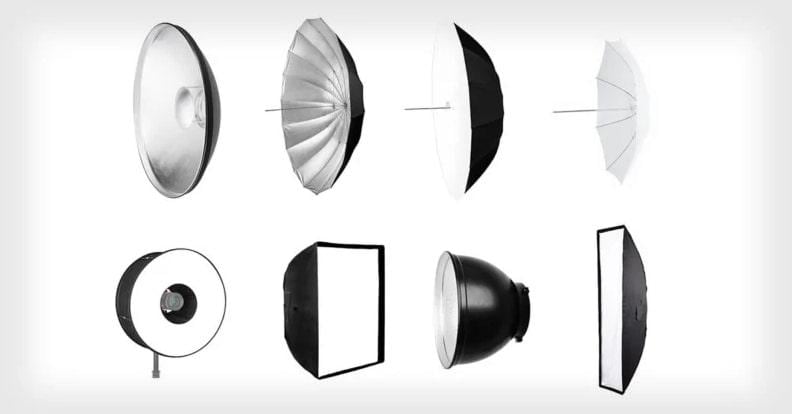
Yes, jewelry photography requires modifiers, but you don’t have to invest in expensive ones to get the right results, and you don’t need a dozen of modifiers to get what you want. Jewelry is highly reflective, so you want to control what is reflected towards you.
Light modifiers can also help you control the shape of products. You only need a small light tent to control reflections, lighting, and background. You can buy them online or at local equipment stores. You can also make light modifiers with white foam boards and surround the jewelry like a box.
-
Don’t Use an On-Camera Flash for a Jewelry Lighting Setup
On-camera flash is the worst thing you can use for shooting jewelry product photos. It’s simply too bright, and when you combine this with the reflective nature of products, you will get messy images. The results will be even worse since you’re shooting from up close.
On-camera flash creates distracting and harsh shadows. You can use off-camera flash on some rare occasions, but this means putting the flash far away and testing several angles and positions until you can see the desired results. However, it doesn’t give you anything special in return, so stick with soft lighting and natural light.
-
Constant & Stable Lights Are Key
Instead of that, you must use continuous lighting to present products accurately. When you’re using a lighting modifier and lighting, you have absolute control of the scene, and you can change the setting by moving the light source closer or farther away to change shape and get creative.
Stable lighting isn’t only about the light source and the camera. Always use a tripod when taking jewelry shots and get a macro lens with a 60mm focal length to get the best results.
-
You Can Use Natural Light as Well
Using natural light is the best way to take photos of shiny jewelry like diamond. You can do this outdoors or indoors close to a window with natural light coming in. A vital thing to remember is that you should always use natural lighting as an indirect source.
In other words, you don’t want light hitting your jewelry directly, but it should be close enough to the window to illuminate your products without reflecting the light. If the light is too harsh, you should diffuse it by covering the window with some paper and experimenting with different colors to make your images interesting.
Jewelry Photography Lighting Setup Ideas
Now that we’ve shared some crucial tips to help you set up lighting properly, let’s look at some exciting setup ideas to create fantastic lighting for your images.
-
45-Degree Angle Lighting
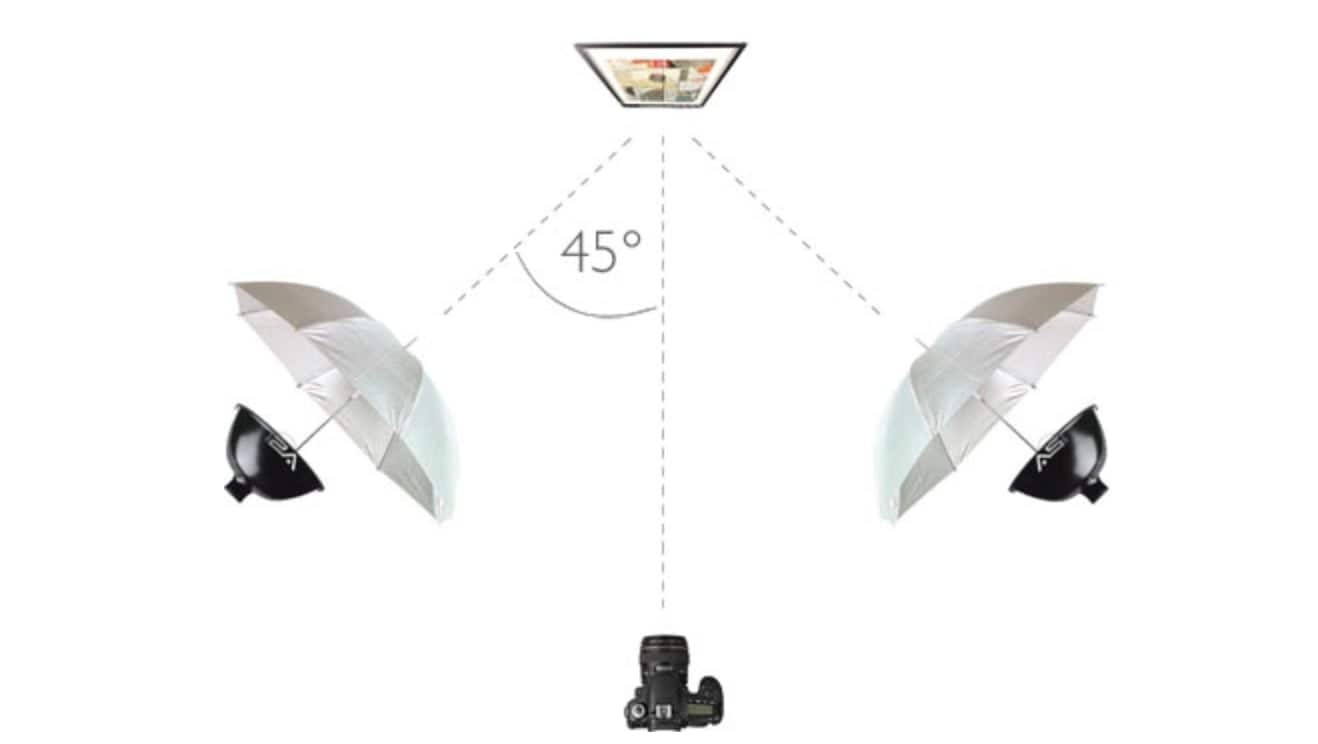
Positioning your lighting is essential, and if you can’t get a bright natural light that’s non-disruptive, you will have to work with your light source – you should place it at a 45-degree angle towards the product.
It’s best to place the light tent or softbox at the same position behind the light ray to ensure you get an evenly distributed and diffused light. If there’s a shadow behind the product when you take photos, place the jewelry farther from the sweep and closer to the camera.
You can also use a V-flat to return the light to the product. This method is excellent for jewelry photography, but you can also use it for portraits.
-
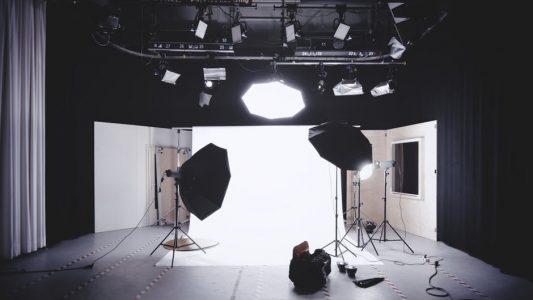
Double Overhead
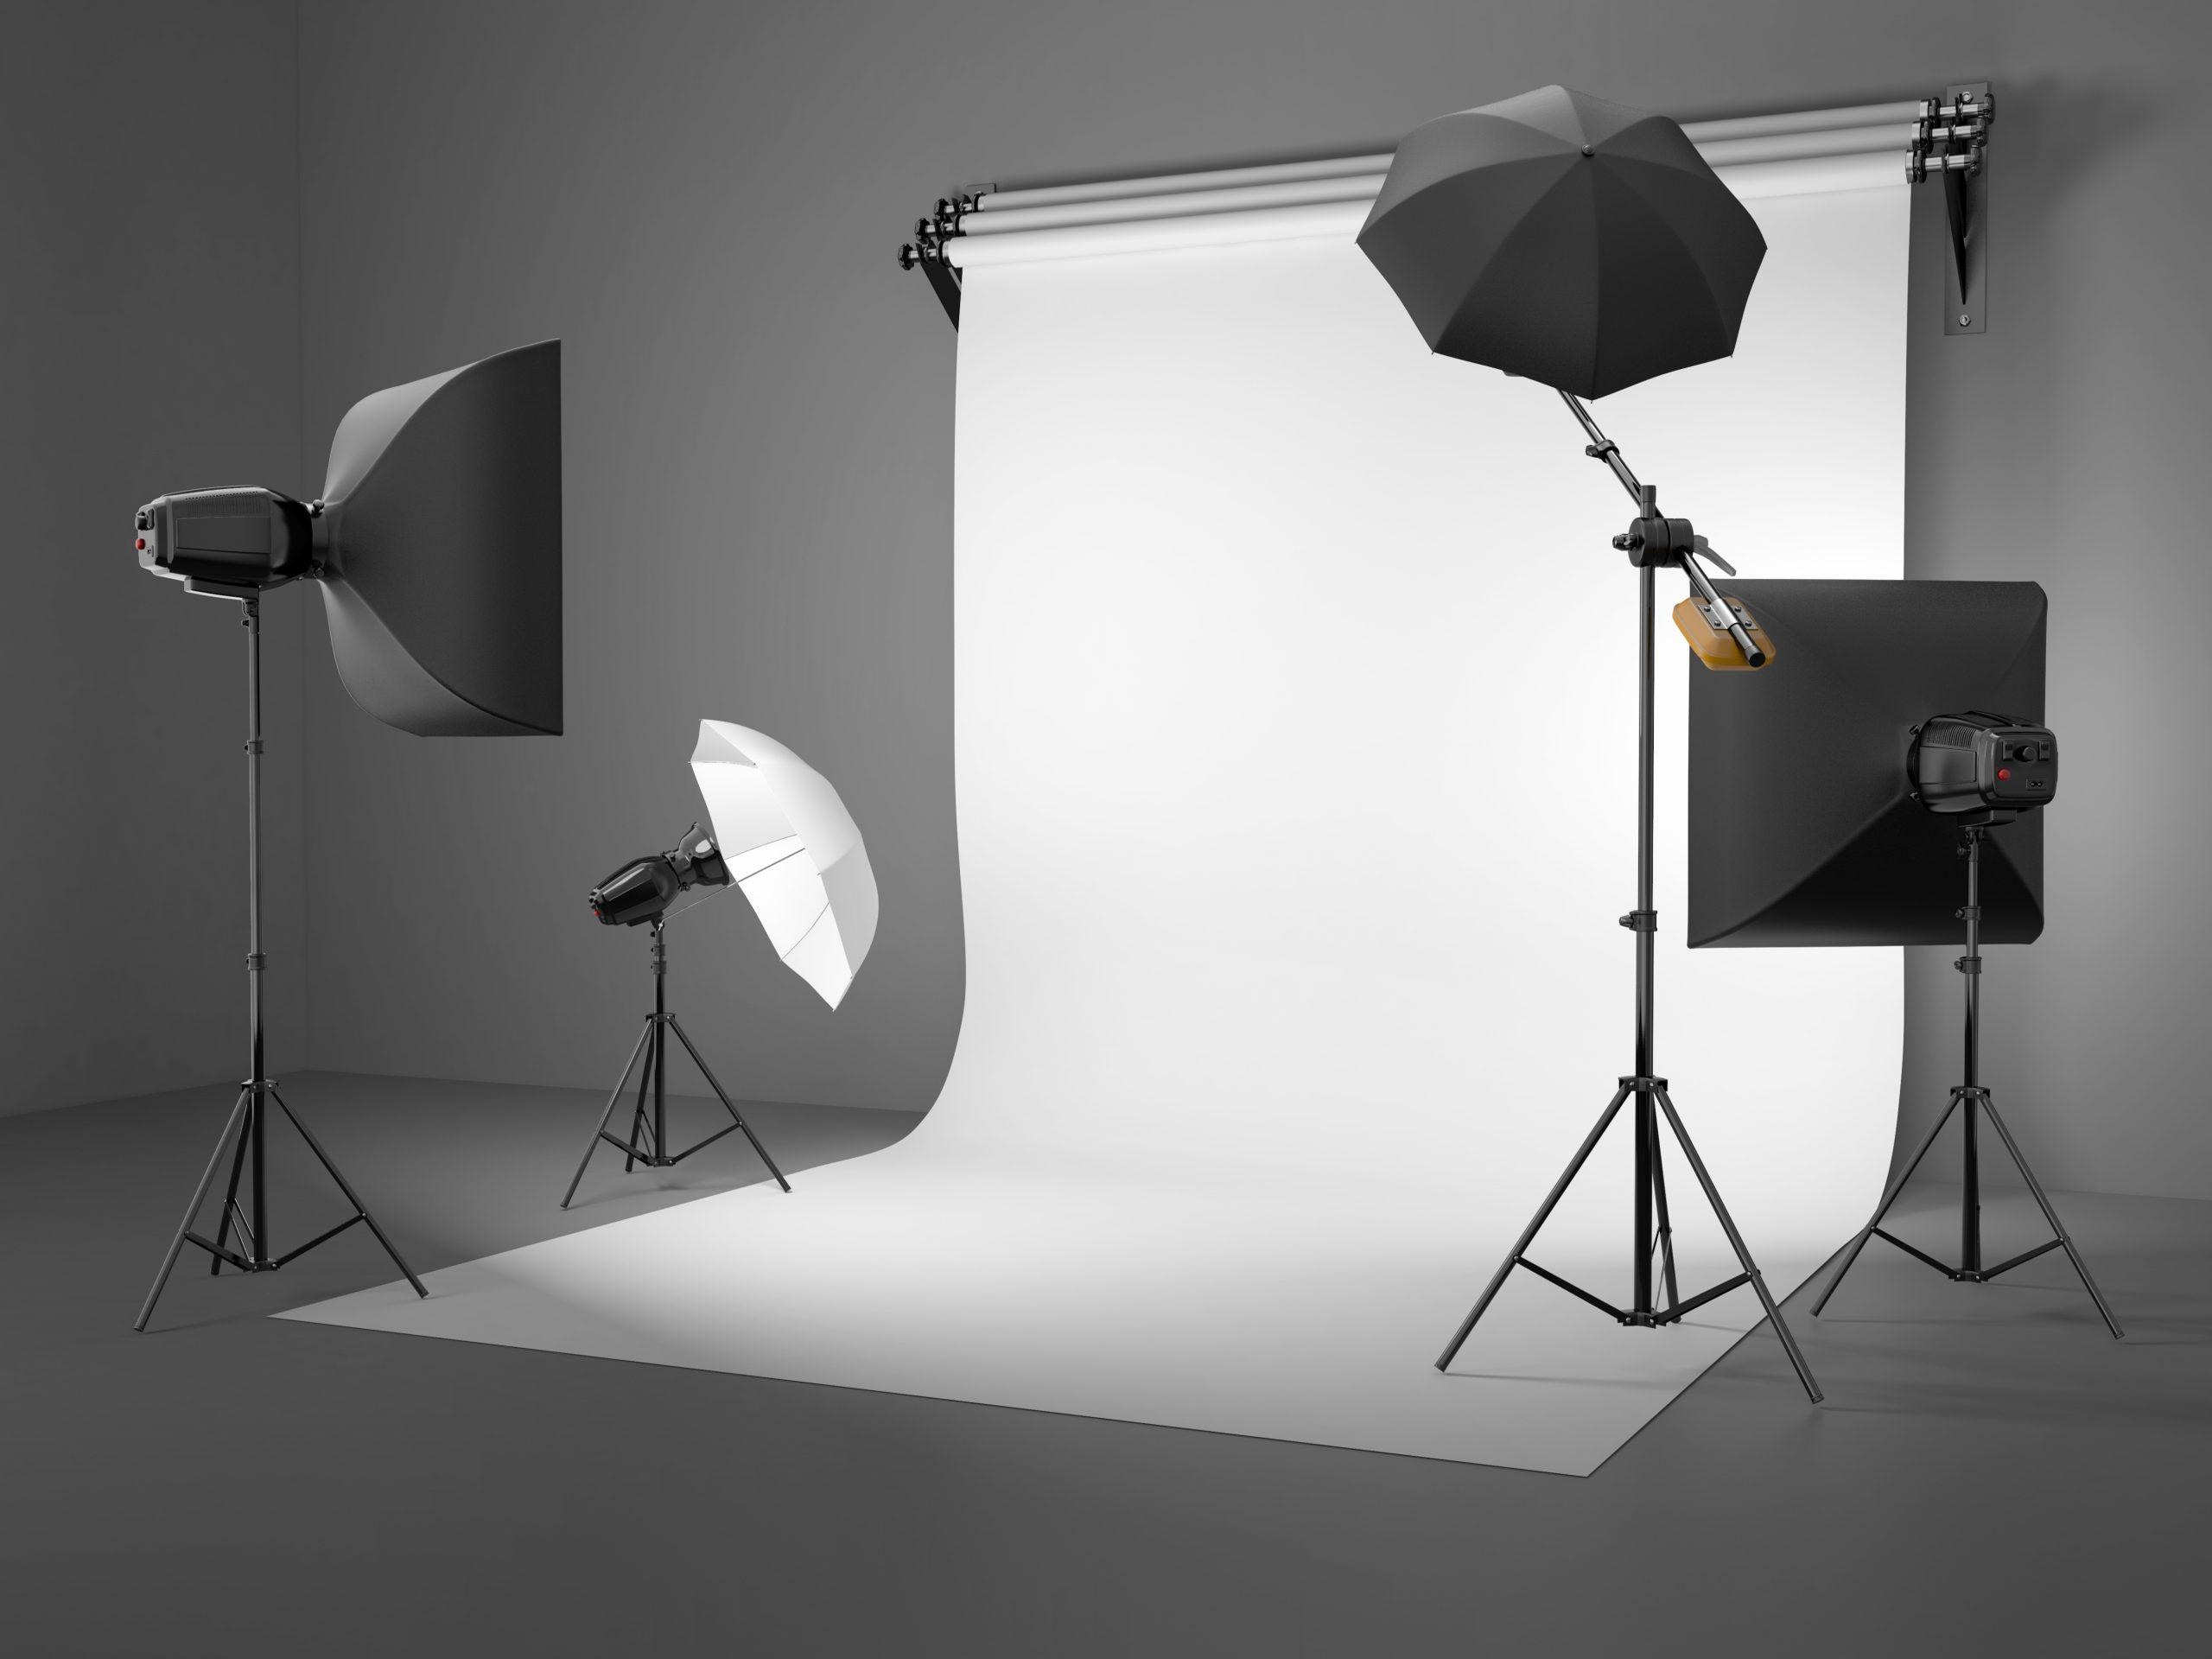
This is one of the best lighting setups for taking shots of jewelry. You must use umbrellas with a bright surface below the products, on the sides, and behind. You can use a big piece of white paper to create a small wall behind and around the product.
Once you’ve done that, put two umbrellas above the product top-down because it will give you a plain white surface with no reflections and a soffit lighting environment. If you don’t have umbrellas, you can also use a light tent with multiple lough sources placed overhead and on the sides to get similar results.
-
Use an AI Photo Generator to Get Perfect Lighting
If you can’t get the desired lighting or simply don’t have the equipment or the right conditions to set everything up, you should explore a great alternative. New sophisticated AI tools have emerged to generate the desired lighting in the background.
For example, Booth.ai is a tool that lets you generate and insert a new background around your jewelry quickly without worrying about shadows or reflections. You only have to photograph the product and then insert a desired background.

You can even convert mannequins into models to create amazing lifestyle jewelry photos or generate models if you don’t have any. These tools use sophisticated algorithms that let you generate ideal photos and backgrounds in a matter of seconds.
-
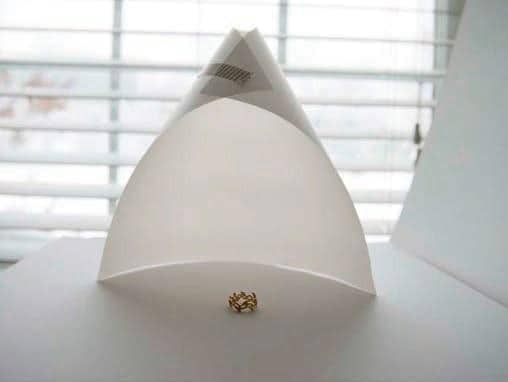
Use a Light Cone
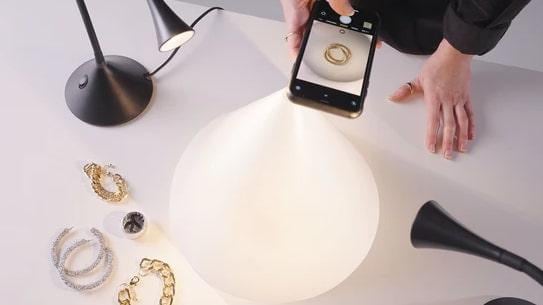
The light cone is very useful for taking photos of small and reflective objects. These props are super-affordable, but they do the job really well. When buying one, you should consider the size, and there are usually three variations.
Place the cone over the product when taking photos and put it on a white form board. When using a light cone, you can use any kind of light source, like flashlights, flashes, lamps, reflectors, or natural light.
Light up the cone from the sides and test out different angles and distances until you have what you need. Then carefully place the camera above the cone and set the camera’s angle at 90 degrees to get perfect jewelry shots.
Conclusion
If you follow the tips and ideas we’ve mentioned today, we guarantee you will be able to make some decent jewelry photos. Of course, it takes time to perfect the craft and get ideal shots that will do wonders. Take the time to read our other guides and learn about ideal camera settings for jewelry photography. Good luck!