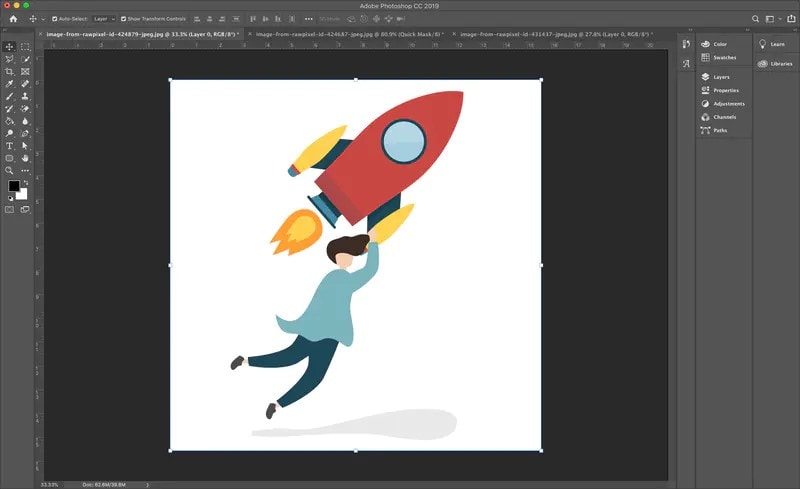
If you have perfect photos with an annoying white background that doesn’t fit the visual appeal, you can use Photoshop to eliminate the distraction. If a white background is all that stands between you and your photography goals, there are easy ways to remove it from your photo in Photoshop.
A white background in an image can be an obstacle that stands in your way, preventing you from getting your logos, graphics, and product photos online.
Whenever you try to remove a white background in Photoshop or make it transparent, you spend too much time and effort making your visuals look perfect. Well, you can remove white backgrounds from multiple images in a heartbeat with the proper techniques.
In this article
Why Remove White Background From Images
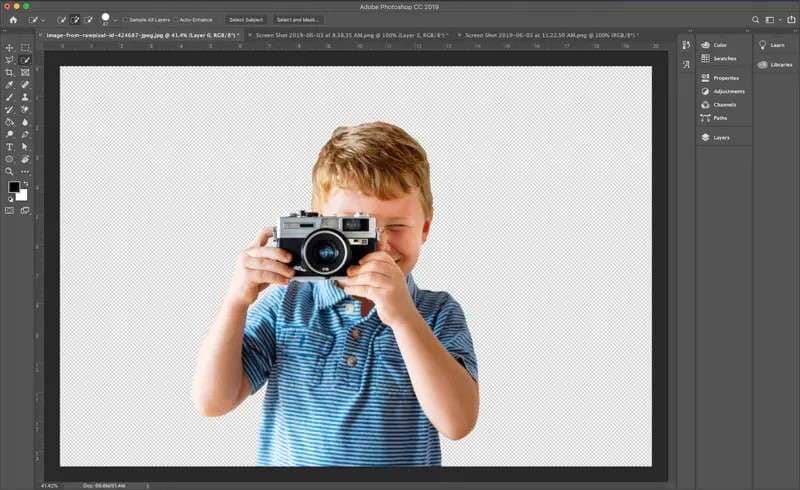
Though white backgrounds can complement your product photography or portrait photos, they can also make your visuals look dull. A white background can become a distraction instead of an excellent way to showcase a product.
Nowadays, online customers are highly visual creatures. They rely on photos and images to absorb information. Since you use images to tell an engaging visual story, the background you use determines the effectiveness of your storytelling.
The image visuals you opt for directly impact how your customers perceive your work. Your visuals won’t capture your viewers’ attention if a messy background keeps distracting them.
In addition, a white background is sometimes not an appropriate way to communicate a particular message. In such situations, you remove the white background from your images to ensure your visuals have more impact on the target audience.
Why Shooting With a White Background Is a Good Idea
Aside from helping you capture the splendor and grandeur of your products, a white background saves your time, effort, and resources on endless editing. That’s why professional photographers use white backgrounds in lifestyle and product photography.
Shooting with a white background helps your photography efforts in various ways:
- You can quickly and effortlessly change the backdrop according to your needs. Whether you’re shooting portraits or product photos, white is the best color to create enough contrast to make a visual impact. In addition, white is much easier to remove or replace, regardless of the software you use.
- Images with a white background are ideal for visual promotions throughout the year. If you’re into product photography, the white background in images helps you promote your visuals throughout all seasons. Since white gives you a clean backdrop, you can adjust your visuals to any seasonal photoshoot. That makes them highly reusable at any time of the year.
- You can spend less time on editing. Photoshop lets you remove the white background from your images in a few steps. Since you can seamlessly change backgrounds according to your needs, using the white background for your visuals saves time on editing and streamlines the retouching process.
- Images with a white background are highly reusable. It’s more time-efficient and seamless to bulk-shoot pictures on a white background for the entire year. Aside from making your visuals reusable, your images are ideal for any occasion. In addition, you can save money and time on location fees.
- White background makes your photos perfect for celebrations. No matter the event, you can use images with a white background for any kind of celebration or special day, thus increasing your chances of sales.
Different Ways to Remove a White Background in Photoshop

Here are the four most effective ways to remove a white background from your images in Photoshop.
Method 1: Using Magic Eraser to Remove a White Background in Photoshop
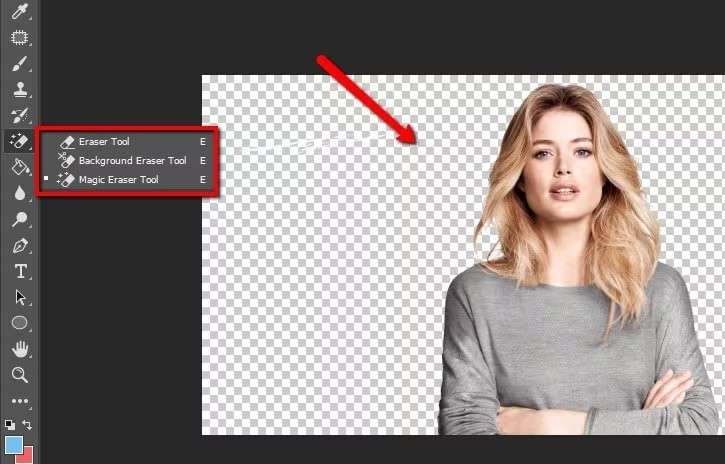
Magic Eraser works similarly to Magic Wand with a slight difference. Instead of creating a layer mask selection, Magic Eraser permanently removes the background by deleting it. Here’s how to use it.
- Step 1: Select Magic Eraser.

Press the E key to navigate to Magic Eraser. You can also find it in the toolbar (it looks like an eraser).
- Step 2: Select your image settings and delete the background

Set Tolerance to 32, check the Anti-alias box, and leave Opacity on 100%. Delete the white background by clicking the white background to delete it, and erase it directly from the selected image layer.
Keep in mind that these changes are permanent. You can undo your changes by pressing Control + Z.
Method 2: Using Select Color to Remove a White Background in Photoshop
Select Color is another excellent Photoshop tool for removing backgrounds of one color in an image, including white. Here’s how to use it.
- Step 1: Select Color Range.
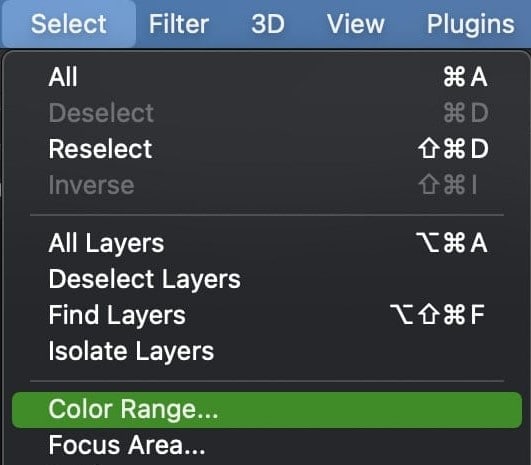
Open Photoshop, upload your image, and select your Image Layer. Navigate to Select > Color Range to open the dialogue box.
- Step 2: Create your selection.
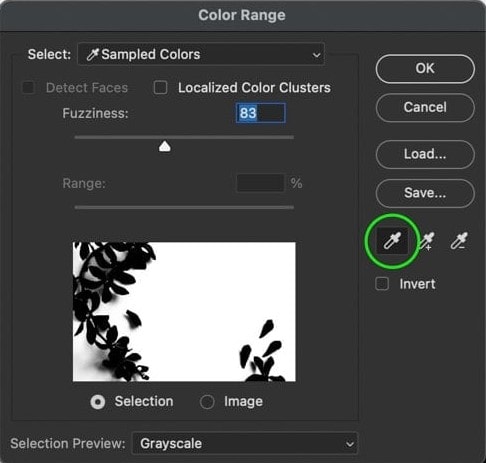
Click the white background to create your selection. If a single click gives you a satisfying result, you’re golden. However, if you’re unsatisfied with it, you can refine it by adding (Shift) or subtracting (Alt or Option) from your sample. To add to it, simply select the shades of white. To subtract, click the colors you don’t want to see.
- Step 3: Set the Fuzziness slider.
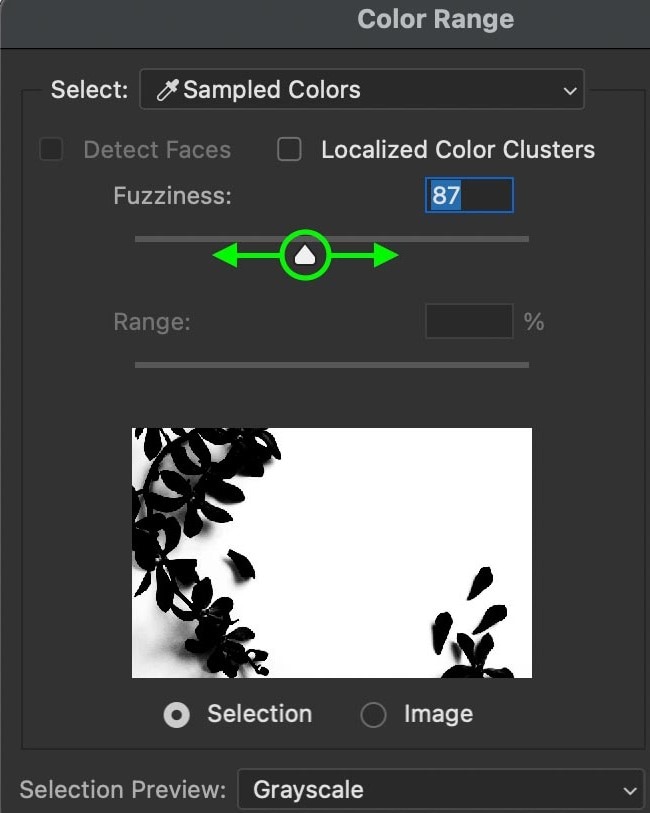
While you can set Fuzziness to 0, every photo is different and requires a unique value. So, work your way up to see what best fits your image. Keep Selection Preview on Grayscale to monitor your changes.
- Step 4: Invert your selection.
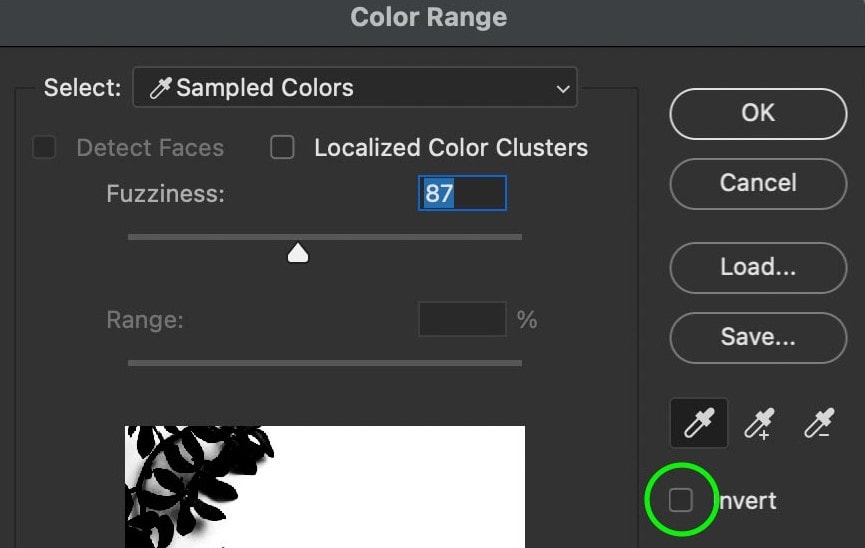
Once you’ve set the Fuzziness, click the Invert option to remove the white background and then OK to confirm.
- Step 5: Apply your changes.
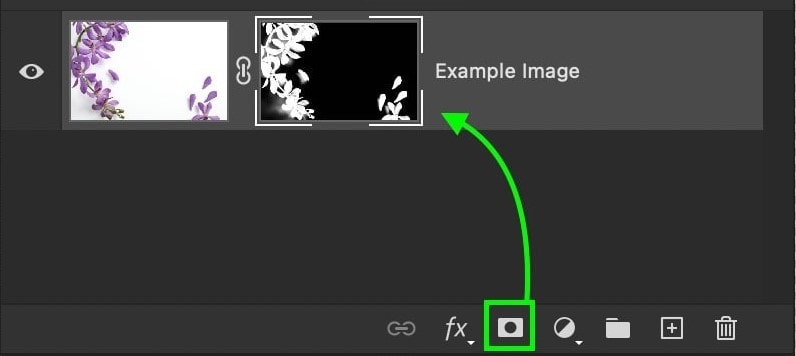
Once your selection is active, click your image layer to apply your changes and make the white background transparent.
Method 3: Using Magic Wand to Remove White Background in Photoshop
The Magic Wand tool is an excellent solution for removing a white background in Photoshop. It allows you to create background selections based on similar color patterns in your images. Here’s how to use Magic Wand to eliminate a white background from an image.
- Step 1: Access Magic Wand.

Run Photoshop and use it to open an image with a white background. Find Magic Wand in the toolbar, or simply press the W key. If you can’t find it, click the Quick Selection sidebar and hold the tool icon to see other tool options. Select Magic Wand.
- Step 2: Set your image settings.

The next step is adjusting your image settings to prepare your photo for removal of the white background. Navigate the Magic Wand settings to Sample Size and select Point Sample to determine the amount of sampled color for your image background. Set the Tolerance to 25 and check the Anti-alias box.


- Step 3: Create a background selection.

Create a selection by clicking on the white background in your image. Photoshop will adjust the color palette according to the image sample for accuracy.
- Step 4: Make the white background transparent.
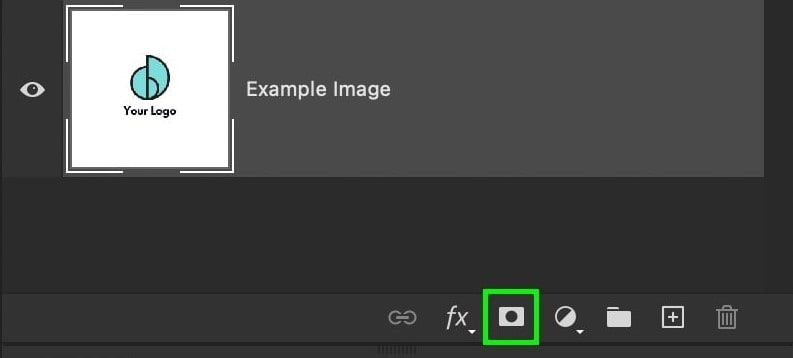
Select your Image Layer and navigate the Layers Panel to click the layer mask icon. Click Command to make your subject visible again by inverting the layer mask. This step will remove the white background and replace it with your selection.
Method 4: Using Remove Background to Remove a White Background in Photoshop
The Remove Background feature is an excellent way to remove a white background from your images in Photoshop. This option is only available in Photoshop CC 2020 and newer. If you use the latest Photoshop edition, this feature helps you turn a white background transparent with a few clicks. Here are the steps.
- Step 1: Select and unlock your Image Layer.
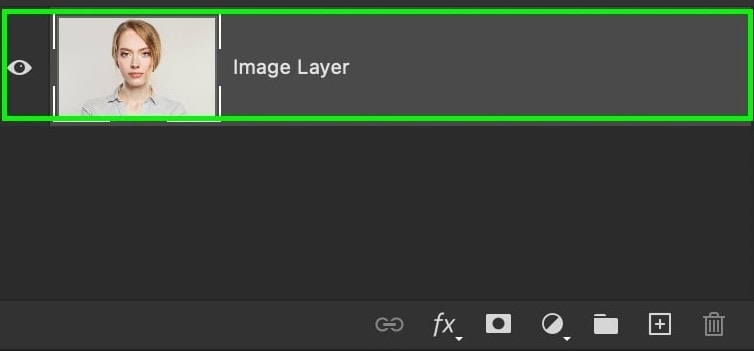
Run Photoshop and upload your image with a white background. Unlock and select your Image Layer.
- Step 2: Select Remove Background.

Navigate to Window > Properties to open the Properties panel. Click Quick Actions and select Remove Background.
Method 5: Using Channels to Remove a White Background in Photoshop
Another excellent method for getting rid of a white background in Photoshop is the Channels option. Here’s how.
- Step 1: Navigate to Channels
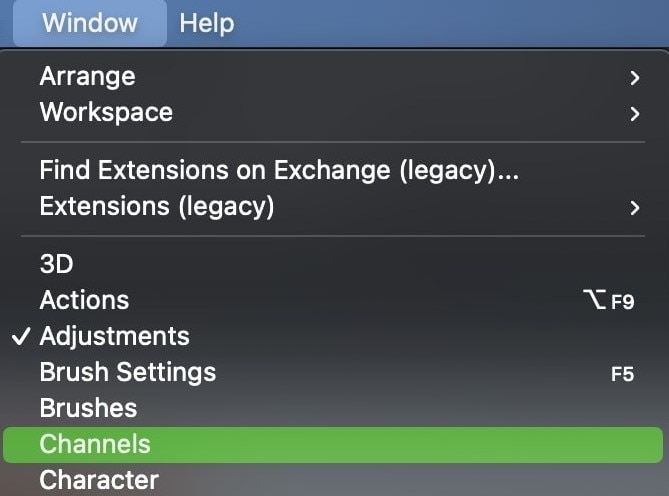
Open Photoshop, upload your image, and navigate to Window>Channels. When the Channels tab opens, you’ll see three color options – Red, Green, and Blue. Each color channel comes with different contrast settings.
Click on the channel that suits your image scenario and drag and drop it to the new layer icon. This step will create a new channel copy layer.
- Step 2: Adjust Input Levels
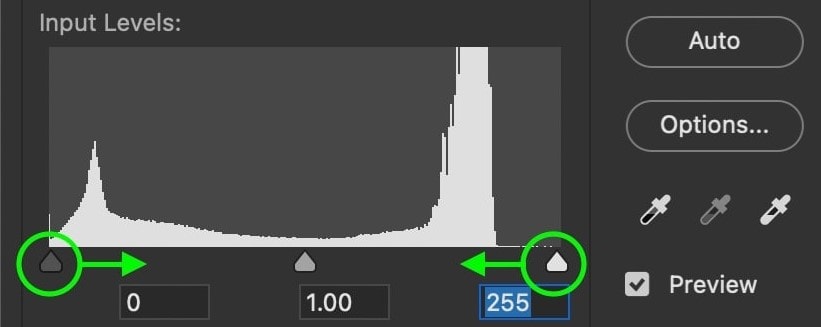
Press Ctrl and L keys to go to the Levels panel and apply new settings to the duplicate channel layer. In the Input Levels section, drag the left and right slide bars to adjust shadows and highlights. These settings will add more contrast to your photo.
- Step 3: Create and apply a selection to remove the background

To turn the duplicated channel into a selection, click on the channel layer thumbnail while holding Ctrl to create a selection. Now, navigate back to Layers and click on your selected image layer. Apply your new selection by clicking on the layer mask icon.
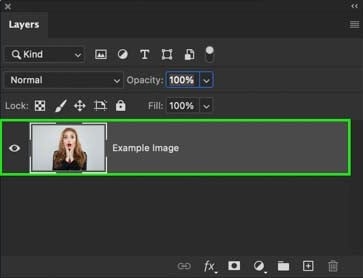
Click on the layer mask to select it, and press Ctrl + I to invert your selection and remove the white background. If there are transparent leftovers in the image area, use the Brush Tool (B) to delete them.
How to Use AI to Remove a White Background

Nowadays, many AI-powered image generators, photo enhancers, and photography editors allow you to manipulate the white background in an image. For example, Booth.ai is the first AI tool that comes to mind.
Booth.ai is an excellent generative AI tool for product photography. You upload a photo and input text on what you want Booth.ai to do with it. The tool then puts your visual in any place or setting you choose.
Booth.ai provides photorealistic 3D and 4K photos with lifelike custom backgrounds, reflections, and shadows. It can turn average images into professional photography without any manual editing.
However, remember that Booth.ai can’t remove the background from your image. It can only change it. Here’s how the tool works.
- Step 1: Upload your photo.

Visit the Booth.ai website and click Get Started or Try it today. Once you create an account and log in, click AI Scene Generator and then the plus sign to upload your photo.
- Step 2: Change your background.

Change the image background by selecting the Product scene change scenario in the Choose Workflow section. This option will swap the white background in your image with an appropriate alternative.
- Step 3: Generate a new image.

The final step is refining your photo by adjusting the Lighting, Time of Day, and Camera Angle settings. If you want to add a new color to your image background, describe it in the Anything else to describe the photo section. Once you do, click Generate Images to receive your photos.
Conclusion
As you can see, removing the white background in your images doesn’t have to be complicated or time-consuming. You can expedite the process by knowing your way around the Photoshop tools.
In addition, you have an AI-powered alternative that you can rely on to change the image background with a few clicks. Gone are the days when image editing was a tedious process that required tremendous effort. Nowadays, you can harness the power of technology and let it do all the hard work for you.

